Is your sink barely trickling or not running at all? Low or no water pressure at a sink is a common issue, and thankfully, it’s usually caused by something small—like a clogged aerator or a partially closed valve. Before you panic or call in a professional, know that many of these problems can be identified and fixed with a bit of troubleshooting. This guide will walk you through the causes and solutions, whether the issue lies in your kitchen, bathroom, or utility sink.
1. Identify the Scope of the Problem
Start by narrowing down the source of the issue. Run other sinks, your shower, or the washing machine. If only one sink is affected, the problem is localized. If multiple fixtures have low pressure, it could be a larger plumbing issue.
Next, test both hot and cold water. If only the hot side is weak, the issue may stem from your water heater. If both are low, then the sink fixture or the supply line may be the problem.
Finally, check with neighbors or look for alerts from your water provider. A widespread issue like a broken main or scheduled maintenance could be impacting your pressure.
2. Location-Specific Troubleshooting
Kitchen Sink
In the kitchen, one of the most common culprits is a clogged aerator. Unscrew it from the faucet, soak it in vinegar, and scrub it clean. If you have a pull-out hose, check for kinks or blockages.
You’ll also want to inspect the faucet cartridge inside the handle. If water flow is inconsistent or has stopped completely, sediment may have built up. Finally, make sure the shut-off valves under the sink are fully open—sometimes they get bumped and partially close without notice.
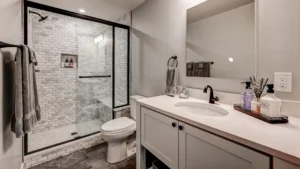
Bathroom Sink
Bathroom sinks experience similar issues. Begin with the aerator—cleaning or replacing it may immediately solve the problem. If pressure is still low, the cartridge or internal restrictor may be blocked and need a rinse or replacement. Don’t forget to verify that the hot and cold water valves beneath the sink are wide open.
Utility or Laundry Sink
Utility sinks are often connected to older or less-used plumbing lines, which can mean more sediment buildup or corrosion. Clean the aerator first, then ensure the shut-off valves are completely open. If you still notice poor flow, inspect the surrounding pipes, especially if they’re older or have visible corrosion.
3. System-Wide Plumbing Issues
If the issue spans multiple sinks or fixtures in your home, it’s time to look at broader system components. Start with the main shut-off valve—make sure it’s fully open. Then locate the Pressure-Reducing Valve (PRV), usually found near the main line. A malfunctioning PRV can restrict water flow throughout the home.
Older homes may have corroded pipes, especially if they’re made from galvanized steel. Corrosion narrows the pipe’s interior, reducing pressure. Leaks can also reduce water flow; you can test for one by turning off all fixtures and watching your water meter. If it moves, you’ve got a leak somewhere.

4. DIY Troubleshooting Steps
If the problem is isolated to one sink, try these steps:
- Clean or replace the aerator.
- Ensure the under-sink shut-off valves are fully open.
- Disconnect the faucet supply lines and run water into a bucket—this will tell you if the problem is the faucet or the plumbing.
- Remove and clean the faucet cartridge.
- Flush out the lines by running water through all faucets for a few minutes.
- Recheck your main shut-off valve and Pressure-Reducing Valve (PRV).
Conclusion
If you’re dealing with no water pressure in your sink, there’s a good chance the problem is minor and easily fixable. Start with the basics: clean the aerator, open your shut-off valves, and flush the lines. If the issue persists, it could be a deeper problem like a faulty PRV, hidden leak, or old piping. Whatever the case, you don’t have to troubleshoot alone. Clarksville Plumbing is here to help restore your water pressure and your peace of mind. Contact us today, and let our experienced team handle it quickly and efficiently!